Wednesday, 31 October 2012

Post-production

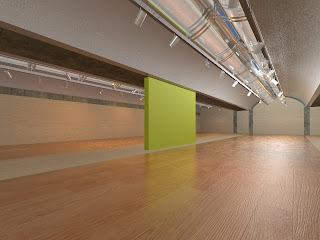
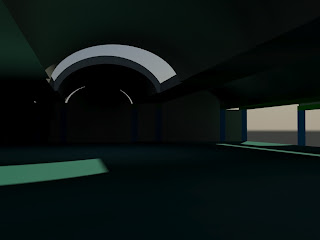
So the gallery shot was really anemic looking while the auditorium shot was too dim. Thank God for Photoshop/GIMP.

Culture Vulturing: Visitors milling about the north galleries. 
The burn tool was used to punch up the anaemic lighting, giving the space more warmth. Entourage and paintings were also added, with reflections on the polished white oak floors.

Culture Vulturing, part deux: Watching a ballet in the auditorium.
The burn and dodge tools are my best friends now. The auditorium was burned and the arch dodged to boost the constrast in colour, and the stage was also dodged to make it the focus of the image. Entourage was added to the seats and stage.


Just to show the creepy things that happen during post-production.


Render time!!

So apparently, the stray pixels/speckles are due to a low final gather setting (Thanks, Mr. Koh!). So, I boosted up the final gather setting to high, making rendering time for each image an hour long. Joy.

A low quality one with bipeds scattered about, so I know how tall the entourage should be later during post-production.

A really dim auditorium...

And a bland looking gallery space housing my prized Mademoiselle Pogany on a pedestal, rendered in semi-polished brass.

Tuesday, 30 October 2012

Ugh, lighting...


Gallery space

Hmm, lighting is a bit anaemic... maybe some post-production work to make it pop?

Ah, yes, decided to model the auditorium as it would make for an easier rendering (especially since submission has been brought forward a day).


Needs lighting adjustments, but otherwise ok.

Learning Animation


A really weird video that's the result of messing around with keyframes and whatnot, about a demon possessed teapot, a light mysteriously appearing on a wall, and some really pixelated water.

Saturday, 27 October 2012

Test render

Looks ok, I guess... It's pretty dim, but that's due to a temporary lack of artificial lighting. The reflected light on the arches looks rather grainy, however. Wonder why?


Fingers crossed

So, the reflectors have been modelled. Now for material assignment. Obviously, the material cannot possibly be perforated aluminium like the actual thing, because it's hard enough modelling it, much less perforating it. So, it's time to improvise. The frame and light fixtures are normal aluminium, but for the reflecting panes, I assigned chrome with self-illumination cranked up. The arches are polished concrete with reflections enabled. Here goes.


Looks like it works. The light is actually reflecting off the chrome and diffusing over the arches.


Putting the reflectors inside the building itself...


Ok, not quite the effect I was going for. But it would make a great scene for a horror film/game.


After cranking up the reflectivity of the arches, it seems much better. Applying reflectors to all arches...


Perfect! Well, not really, it's still not quite the same as the real thing, but it'll have to do for now. Maybe artificial illumination will help.


Friday, 26 October 2012

Reflectors

So, onto the interiors. The most important innovation of the Kimbell, aside from its unusual cycloidal arches, is the use of perforated aluminium reflectors beneath the skylights, which diffuses harsh sunlight into a gorgeous, silvery wash over the inner curve of the concrete arches. It also happens to be one of the first applications of computer aided design in architecture, as the curve of the metal reflectors was precisely calculated with computers.


Huzzahs.

Tuesday, 23 October 2012

Lighting with IES


Assigned self-illumination to material, achieving a glowing alien sphere as a result.


Photometric target light with IES, achieving a nice downlighting quality.

Lighting

Method 1: select material from "arch and design", select "self illumination", change intensity, select "illuminate the scene." Colour of light can be changed.

Method 2: Artificial lighting: select photometric target light, place in model. Shadows can be turned on.

IES files can be used for superior artificial lighting.
To use IES file, change light distribution. Uniform spherical is default for photometric.
Select photometric web > choose photometric file, select and load IES file, and render. Intensity can be changed. http://bim.wikispaces.com/file/view/Creating+a+Light+with+a+photometric+web+using+an+ies+file.pdf

For downlight model (light washing over wall), model a small sphere, place it on top of photometric light, and apply the self illuminating material to it. To duplicate: press shift > drag with mouse > select instance.

Shadow types: raytracing/advanced raytracing is very accurate but takes longer time to render.
                       shadowmap/mentalray shadowmap is less accurate, but saves time.

Note: Configure > lighting and shadows > enable hardware shading, enable shadows.

To achieve glowing effect, render tab, scroll to camera effects select glare shader, drag and drop to an empty material slot, select instance.

Monday, 22 October 2012

Critique on project 2a (for posteriority)

1) Humans not all at eye level, must note this problem.
2) Add falling water at water basin with motion blur in photoshop.
3) Photoshop trees in, no 3ds max trees.


Thursday, 18 October 2012

DONE!


Circumvent: Visitors making their way around the reflecting pool at the north wing of the Kimbell Art Museum.


Navigating the Stars: Visitors interacting with the "Constellation" sculptures by Isamu Noguchi in the Kimbell Art Museum sculpture garden.

WHAT HAVE I DONE


While photoshopping (or in my case, GIMPing), hilarious things can happen during the process.

Rendered!


Setting the render size to 1000px length...


1st exterior render


2nd exterior render


Entrance, just for fun.


Porch with shadow, also for kicks.


Almost there...

Selecting views...

Ah yes, the dreaded grass. The grass found in the materials selection was horribly flat and unnatural, so I referred to this online tutorial to produce more realistic grass with the hair & fur modifier: http://www.cgrats.com/realistic-grass-using-the-hair-and-fur-modifier.html


Bipeds at 175cm, to gauge the proportions of the sculptures. The sculptures are true to the actual ones, although I took liberties with the material, choosing polished granite over the duller basalt used in the real things.


Other view with camera correction applied.


Monday, 15 October 2012

Material Assignment

Assigning materials and adjusting with the UVW Map modifier:


This is a good view, I think. I just need to wait for the image to finish rendering before saving next time. :P


Perhaps a view to the sculpture garden?

Sunday, 14 October 2012

Context

After messing around with the building itself for so long, with some curtain walls, skylights and material assignment to spare, I decided to move on to context instead for a change of pace:


Context, done by extruding imported dwg files again, obviously.


Travertine steps leading to entrance.


Steps on right porch and water basin.


Sculpture garden. Will add sculptures later.


Test render 1


Test render 2. Now we're talking.

Boolean

Cutting skylights with boolean-subtract modifier:


That is so Salvador Dali I can't stand it.

Saturday, 13 October 2012

Hacking....cough.

While hacking my lungs out, progress is made:


Already some interesting shadows are forming...